
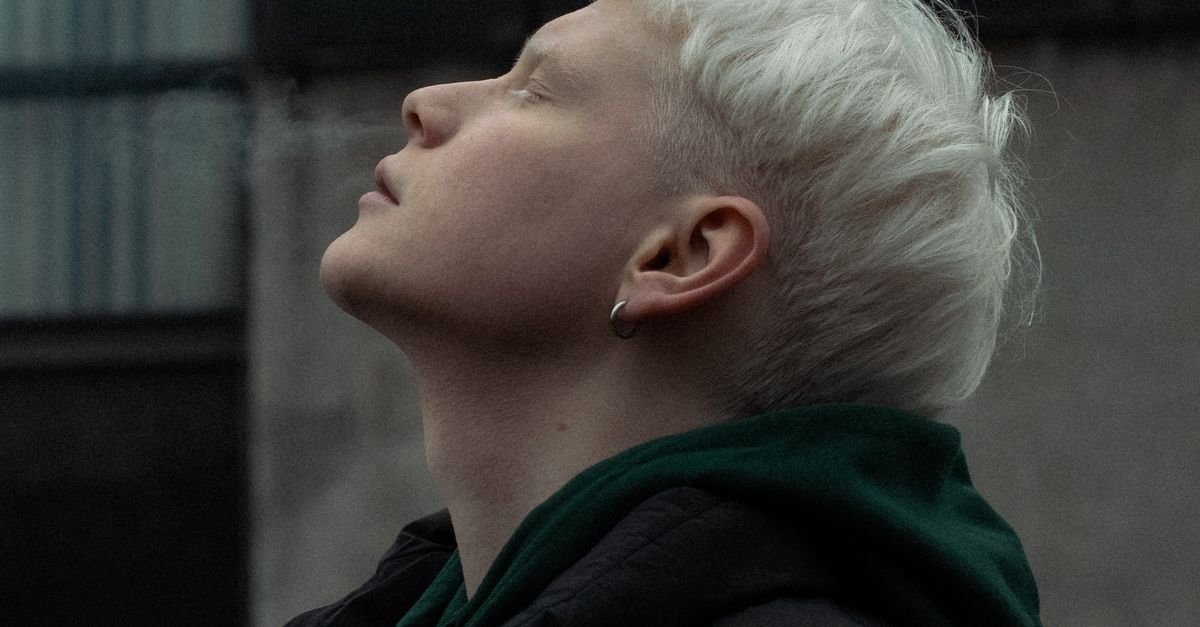
Bleached hair is a bold statement that can transform a look from everyday to runway‑ready. Whether you dream of icy platinum, sun‑kissed highlights, or a pastel pastel hue, achieving a flawless blonde starts with understanding the chemistry, preparing the strands, selecting the right products, and caring for the result.
This guide walks you through every stage of the bleaching journey, from the science behind lift to the daily rituals that keep your color vibrant and your hair healthy.
Understanding the Science Behind Bleached Hair

Before you dip a brush into a bowl of powder, it helps to know what actually happens inside each strand when you apply bleach. Hair color originates from melanin, the same pigment that gives skin its tone. Two types of melanin dominate: eumelanin (dark brown to black) and pheomelanin (red to blond). Bleaching works by breaking down these pigments through an oxidation reaction, which lifts color and reveals the underlying shaft.
How Bleach Alters Hair Color
The active ingredient in most hair bleaches is hydrogen peroxide. When mixed with a bleaching powder, peroxide releases oxygen radicals that penetrate the cuticle, dissolve melanin, and lift the hair up to several levels. The more peroxide you use, the higher the lift, but also the greater the potential for damage.
Different Levels of Lift
- Level 1–2: Removes only a shade or two, ideal for subtle lightening.
- Level 3–5: Lifts up to a medium blonde, suitable for most dark brown hair.
- Level 6–10: Achieves platinum or pastel shades, often requires pre‑lightening or multiple sessions.
Understanding these levels helps you set realistic expectations and choose the appropriate developer strength for your starting shade.
Preparing Your Hair and Scalp for Bleach

Preparation is the foundation of a successful bleach job. Skipping this phase is the quickest way to experience breakage, uneven tones, or scalp irritation.
Conduct a Strand Test
Always test a small section of hair at least 48 hours before the full application. This reveals how your hair reacts, how long the lift takes, and whether any allergic response occurs.
Gather Tools and Workspace
- Non‑metallic mixing bowl and brush
- Gloves, cape, and protective eyewear
- Wide‑tooth comb and clips for sectioning
- Timer or smartphone alarm
A clean, well‑ventilated area reduces the risk of inhaling fumes and keeps your work surface free from debris that could interfere with the process.
Pre‑Bleach Hair Conditioning
About a week before bleaching, treat your hair with a deep‑conditioning mask once or twice. Strengthening the cuticle in advance creates a buffer against the harshness of peroxide, leading to smoother lift and less breakage.
Choosing the Right Bleach Products and Tools

Not all bleaches are created equal. The right combination of powder, developer, and accessories determines the efficiency of lift and the level of damage.
| Developer Volume | Typical Lift | Best For |
|---|---|---|
| 10% (3% peroxide) | 1‑2 levels | Fine or previously lightened hair |
| 20% (6% peroxide) | 2‑4 levels | Medium density hair, most dark browns |
| 30% (9% peroxide) | 4‑6 levels | Thick, resistant hair, multiple‑level lifts |
| 40% (12% peroxide) | 6‑8 levels | Professional use only, very dark or resistant hair |
Selecting the Ideal Developer
For most home users, 20% developer offers a balance between lift and safety. Reserve 30% or higher only if your hair is extremely resistant and you have experience handling strong oxidizers.
Picking a Powder Bleach vs Cream
- Powder Bleach: Provides maximum control over strength, ideal for custom mixes and high‑lift scenarios.
- Cream Bleach: Pre‑mixed with a lower‑strength developer, easier for beginners, but less flexible for precise lift.
Essential Tools Checklist
- Aluminum or plastic mixing bowl (no metal)
- Tint brush with firm bristles
- Wide‑tooth comb for detangling
- Sectioning clips (at least 12)
- Heat cap or foil for targeted processing
The Step‑by‑Step Bleaching Process

Now that you have the science, preparation, and tools covered, it’s time to execute the bleach application. Follow these steps methodically to achieve even lift and minimize damage.
Step 1: Mixing the Formula
- Put on gloves and measure the powder bleach according to the manufacturer’s ratio (usually 1:2 powder to developer).
- Slowly add developer while stirring with the brush to avoid splashing.
- Mix until the consistency resembles a thick pancake batter—smooth, without lumps.
Work quickly; the mixture begins to lose potency after a few minutes.
Step 2: Sectioning the Hair
- Divide the hair into four main quadrants (back left, back right, front left, front right) using clips.
- Further subdivide each quadrant into 1‑inch subsections for precise application.
Proper sectioning ensures you can monitor development time for each area and prevents overlapping.
Step 3: Application Technique
- Start at the back, where hair is usually the darkest, and work forward.
- Apply the bleach from the mid‑shaft to the ends first; reserve the roots for the last 10‑15 minutes because scalp heat accelerates processing.
- Use the brush to lay a thin, even layer, saturating each strand without pooling.
Maintain a consistent thickness to avoid patchy results.
Step 4: Monitoring Development
Set a timer for the minimum recommended time (usually 20 minutes) and begin checking the lift every 5 minutes after that. Gently wipe a small strand with a damp cotton pad to assess the shade. Do not exceed the maximum time suggested by the product, as over‑processing leads to brittleness.
Step 5: Rinsing and Neutralizing
- When the desired lift is reached, rinse hair thoroughly with cool water to halt the oxidation.
- Apply a protein‑rich neutralizing shampoo to restore pH balance.
- Follow with a deep conditioner or hair mask, leaving it on for 5‑10 minutes.
Rinse again with lukewarm water and gently pat dry with a microfiber towel.
Step 6: Toning for Desired Shade
Bleached hair often displays unwanted brassy tones. A toning shampoo or a demi‑permanent violet/purple toner can neutralize yellows and oranges. Apply the toner according to the product’s timing instructions, then rinse and condition.
Aftercare: Maintaining Healthy Bleached Hair

Bleaching removes natural oils and can weaken the protein structure. Consistent aftercare preserves color vibrancy and prevents breakage.
Hydration and Protein Treatments
- Use a weekly deep‑conditioning mask containing keratin or hydrolyzed wheat protein.
- Incorporate a leave‑in conditioner with UV filters to shield against sun‑induced fading.
Color‑Safe Shampoos
Choose sulfate‑free shampoos formulated for blonde or highlighted hair. These cleansers are milder and help maintain the toning pigments longer.
Limiting Heat Styling
- When possible, air‑dry or use a diffuser on low heat.
- If you must use a flat iron, apply a heat protectant spray and keep the temperature below 350°F.
Regular Touch‑Ups
Roots typically need refreshing every 4‑6 weeks, depending on your growth rate. Schedule touch‑ups or use a root‑covering spray between professional appointments to keep the look seamless.
Quick Bleach Hair Facts
- Bleach lifts color by oxidizing melanin, not by adding pigment.
- Higher developer volumes increase lift but also raise the risk of breakage.
- A strand test can prevent disastrous outcomes and helps you gauge processing time.
- Platinum blonde often requires two bleaching sessions spaced 2‑4 weeks apart.
- UV exposure is a major cause of brassiness; hats or UV‑protective hair products extend color life.
Frequently Asked Questions
Can I bleach my hair at home without damaging it?
Yes, but only if you follow a strict preparation and aftercare routine, use the correct developer strength for your hair type, and never exceed the recommended processing time.
How many times can I safely bleach my hair?
Most stylists advise no more than two full‑head bleaches within a six‑month period. If you need additional lift, opt for a spot‑light or balayage technique to limit overall damage.
Do I need to tone my hair after every bleach session?
Not always, but most people find that a toner or purple shampoo is essential after the first lift to neutralize brassiness. Subsequent sessions may require less toning if the underlying tone is already cool.
What’s the difference between a developer and a bleach powder?
The powder contains the bleaching agents (usually persulfates) that break down melanin. The developer is hydrogen peroxide, which activates the powder and determines the strength of the lift.
Will bleaching make my hair grow faster or slower?
Bleaching does not affect the rate of hair growth, which is controlled by the follicle. However, damaged hair can appear thinner because breakage shortens the visible length.
Final Thoughts
Bleaching hair is both an art and a science. By understanding the chemistry, preparing meticulously, selecting the right products, and committing to a disciplined aftercare regimen, you can achieve salon‑level blonde at home while keeping your strands strong and healthy.
Remember, patience and precision are your best allies rushing the process often leads to unwanted damage and uneven color. Follow this guide step by step, listen to your hair’s signals, and enjoy the radiant transformation that comes with expertly bleached locks.

Hi, I’m Emily Carter, the mind and heart behind CaptionMood — a creative space designed to help you express your thoughts with the perfect words.
As a writer and digital content enthusiast, I’ve always believed that captions are more than just text; they’re emotions, stories, and reflections of who we are. With CaptionMood, my mission is to provide unique and engaging Mood Captions, Occasion Captions, and Social Media Captions that resonate with people from all walks of life.
Thank you for visiting and being part of this journey. Through CaptionMood, I hope to inspire, connect, and make every post more meaningful.