
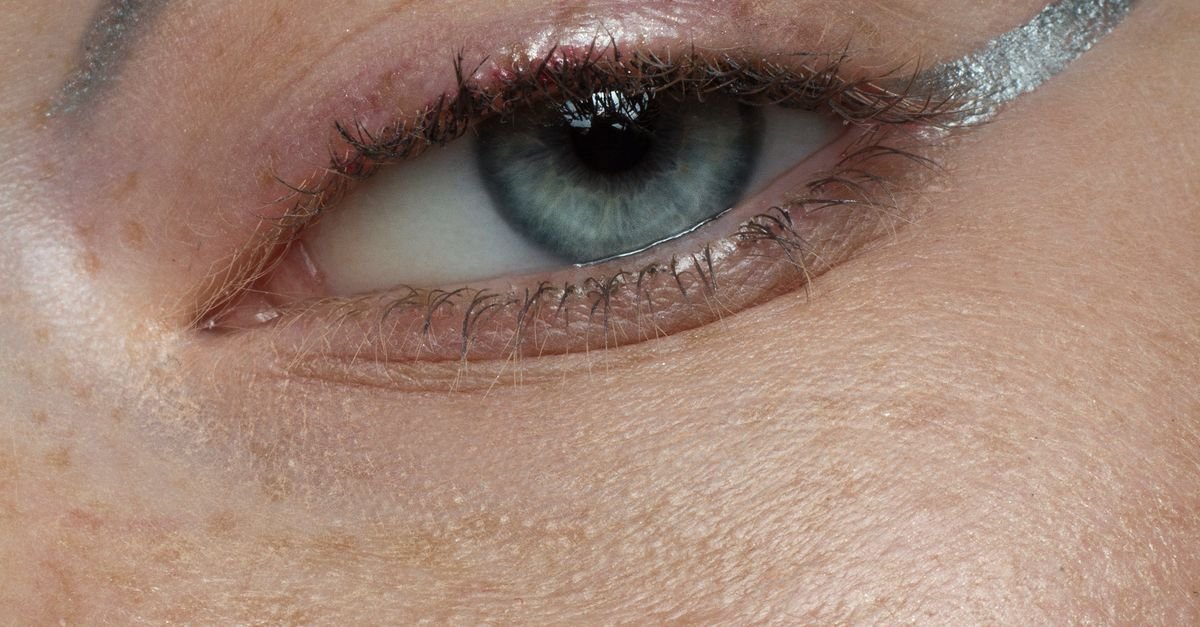
Silver eye makeup has moved from runway novelty to everyday glam, offering a luminous twist that works for everything from casual brunches to late‑night parties.
If you’ve ever wondered how to achieve that sleek, metallic sparkle without looking over‑done, you’re in the right place.
This guide walks you through everything you need tools, techniques, shade selection, and pro tips so you can confidently rock silver lids that turn heads and stay put all day.
Why Silver? The Allure Behind the Metallic Look

Silver isn’t just another color on the palette; it carries a visual weight that reflects light, creates the illusion of larger eyes, and adds a futuristic edge to classic looks.
Historically, metallic pigments were reserved for special‑occasion makeup because they caught the spotlight. Today, modern formulas are softer, more blendable, and suitable for everyday wear.
The cool undertones of silver complement a wide range of skin tones, especially when paired with the right complementary shades, making it a versatile choice for both natural and dramatic styles.
Essential Tools for a Flawless Silver Eye Makeup

Even the most pigmented silver eyeshadow can look patchy without the right applicators. Below is a quick checklist of tools that will make the application process smoother and more precise.
- Flat‑top eyeshadow brush: Ideal for packing pigment onto the lid.
- Fluffy blending brush: Helps diffuse harsh edges for a seamless gradient.
- Fine tapered liner brush: Perfect for defining the lower lash line with silver or complementary colors.
- Silicone smudger: Great for blending metallics without fallout.
- Quality primer: A base specifically formulated for glitter and metallics keeps the shade from creasing.
- Setting spray: Locks the look in place for up to 12 hours.
Step‑by‑Step Silver Eye Makeup Tutorial for Beginners

Prep the Canvas
Start with clean, moisturized skin. Apply an eye primer that matches your skin tone or a clear silicone‑based formula. This step creates a smooth surface and prevents the silver pigment from feathering into fine lines.
Lay the Base
Choose a neutral matte shade—think taupe or soft beige—and sweep it across the entire lid using a flat‑top brush. The base not only evens out skin tone but also intensifies the metallic color when you layer it on top.
Create the Metallic Pop
Using a fresh flat‑top brush, press a creamy or powder silver eyeshadow onto the lid. Pressing, rather than dragging, ensures maximum pigment payoff. For a gradient effect, apply a slightly darker silver or muted gray to the outer V and blend inward with a fluffy brush.
Define and Finish
Line the upper lash line with a dark brown or charcoal pencil to anchor the look. Smudge the line gently with a brush for a softer finish. Add a thin line of silver along the lower waterline using a fine tapered brush. Finish with two coats of volumizing mascara and, if desired, a pair of fluttery false lashes for extra drama.
Choosing the Right Silver Shades for Your Skin Tone

Not all silvers are created equal. Cool‑toned silvers with blue undertones work best on fair to light skin, while warm‑toned silvers with hints of champagne or rose gold flatter medium to deep complexions. Below is a quick reference table to help you match the perfect silver to your natural coloring.
| Skin Tone | Best Silver Shade | Complementary Accent |
|---|---|---|
| Fair / Porcelain | Cool icy silver | Pale pink or lavender liner |
| Light / Beige | Neutral metallic silver | Soft bronze or peach |
| Medium / Olive | Warm champagne silver | Terracotta or copper |
| Deep / Ebony | Rich gunmetal or pewter | Deep plum or burgundy |
When in doubt, test the shade on the inner wrist; the skin there mirrors the undertone of your face more accurately than the back of the hand.
Long‑Lasting Silver: Tips to Keep Your Look Fresh All Day

Silver eye makeup can be prone to creasing, especially on oily lids. Here are proven strategies to extend wear time.
- Layer wisely: Apply a thin layer of primer, a matte base, then the silver shade. Each layer creates a barrier against oil.
- Use a setting powder: Lightly dust a translucent powder over the lids after the silver is applied. It absorbs excess oil without dulling the sparkle.
- Tap, don’t rub: When blending, use a tapping motion with a brush rather than sweeping. This minimizes fallout and keeps the pigment where it belongs.
- Seal with spray: A finishing spray with a silicone base locks the product in place, reducing the need for touch‑ups.
- Carry a mini kit: A travel‑size brush, a small pot of primer, and a compact mirror let you fix any smudges on the go.
Silver Eye Makeup for Different Occasions
Daytime Elegance
For office or brunch settings, keep the silver subtle. Apply a sheer silver shimmer on the inner half of the lid, blend the outer half into a soft matte taupe, and finish with brown mascara. This approach adds a hint of sparkle without overwhelming the professional vibe.
Evening Glam
When the lights dim, go bold. Pack a high‑impact metallic silver across the entire lid, add a deep charcoal or black smoky wing, and line the lower lash line with a metallic silver pencil. Pair with false lashes and a bold lip for full‑on glam.
Festival Fun
Festival looks thrive on creativity. Combine silver with neon accents—think electric blue or hot pink—using a wet brush for a watercolor effect. Layer glitter glue under the silver for extra sparkle that catches stage lights.
Common Mistakes and How to Fix Them
Even beginners stumble. Recognizing common pitfalls can save you time and product.
- Over‑applying powder silver: Too much can look chalky. Use a damp sponge to press the pigment for a smoother finish.
- Neglecting the crease: Ignoring the crease leads to a flat appearance. Blend a neutral matte shade in the crease before adding silver for depth.
- Skipping primer: Without primer, silver often slides off. Always start with a primer designed for metallics.
- Using the wrong brush: A fluffy brush can disperse metallic particles, causing fallout. Stick to flat‑top brushes for packing and silicone smudgers for blending.
Silver Eye Makeup Quick Facts
- Silver reflects light, making eyes appear larger.
- Cool‑toned silvers suit fair skin; warm‑toned silvers flatter deeper tones.
- Primer is essential for preventing creasing on oily lids.
- Press, don’t swipe, when applying metallic powder for maximum payoff.
- Setting spray extends wear time up to 12 hours.
Frequently Asked Questions
Can I wear silver eye makeup if I have oily skin?
Yes. Use an oil‑control primer, set with translucent powder, and finish with a silicone‑based setting spray. This combo creates a barrier that keeps the silver in place.
What’s the difference between silver glitter and silver shimmer?
Silver glitter contains larger, reflective particles that create a bold sparkle, while silver shimmer uses finer pigments for a subtle, luminous effect. Choose glitter for night‑out looks and shimmer for everyday wear.
How do I prevent silver eyeshadow fallout?
Apply a thin layer of eye primer first, then use a damp brush to press the shadow. Tap excess powder off the brush before application and work in a well‑ventilated space to minimize airborne fallout.
Is silver eye makeup appropriate for all ages?
Absolutely. Adjust the intensity: a sheer silver tint works beautifully for teens and younger adults, while a full‑coverage metallic is perfect for mature skin that wants a youthful glow.
Can I mix silver with other colors?
Yes. Silver pairs well with blues, purples, and even warm tones like copper or bronze. Use silver as a base or accent to create multidimensional looks.
How do I remove silver eye makeup without irritating my eyes?
Use a gentle, oil‑based makeup remover. Apply it to a cotton pad, press on the lid for a few seconds to dissolve the metallic pigments, then wipe away. Follow with a soothing eye cleanser.
Final Thoughts
Silver eye makeup is a versatile, eye‑opening trend that can be tailored to any occasion, skin tone, or personal style.
By investing in the right tools, mastering the step‑by‑step technique, and paying attention to longevity tips, you’ll achieve a polished, radiant look that lasts from sunrise to sunset.
Experiment with the shades and finishes discussed here, and soon you’ll discover that the perfect silver sheen is just a brushstroke away.

Hi, I’m Emily Carter, the mind and heart behind CaptionMood — a creative space designed to help you express your thoughts with the perfect words.
As a writer and digital content enthusiast, I’ve always believed that captions are more than just text; they’re emotions, stories, and reflections of who we are. With CaptionMood, my mission is to provide unique and engaging Mood Captions, Occasion Captions, and Social Media Captions that resonate with people from all walks of life.
Thank you for visiting and being part of this journey. Through CaptionMood, I hope to inspire, connect, and make every post more meaningful.