
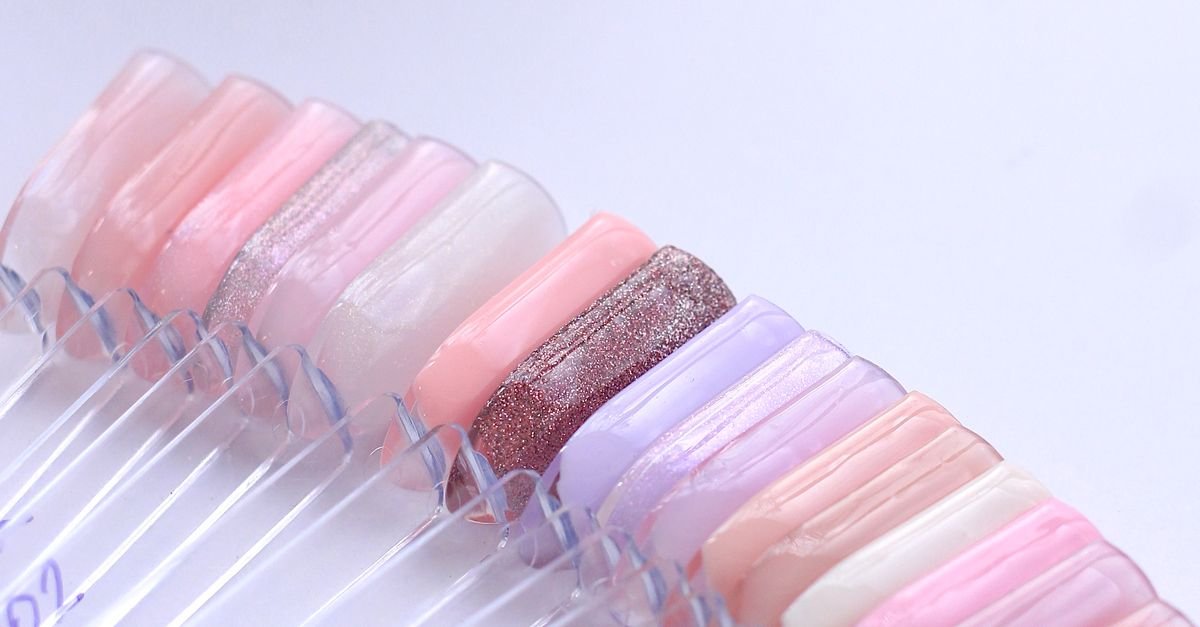
Ombre nails have taken the beauty world by storm, offering a dreamy gradient that can be as subtle as a sunrise or as bold as a neon night sky. Whether you are a nail‑art beginner or a seasoned technician, mastering the ombre technique unlocks endless creative possibilities for everyday wear, special occasions, and runway‑ready looks.
This guide walks you through every stage, from choosing the right tools to perfecting the fade, troubleshooting common issues, and keeping your manicure flawless for days.
Step 1: Understanding the Ombre Nail Concept and Its Variations

Before you dip your brush into pigment, it helps to know what makes an ombre nail distinct. At its core, an ombre is a gradual transition between two or more colors, achieved by blending rather than a sharp line. The effect can be linear (top to tip), radial (center outwards), or even multi‑directional for a marble‑like finish. Popular variations include:
- Classic top‑to‑tip fade
- Reverse gradient (tip to base)
- Half‑moon ombre
- Diagonal sweep
- Layered ombre with glitter or metallic accents
Understanding these styles will guide your choice of colors, tools, and application method.
Step 2: Gathering the Essential Tools and Materials

Success in ombre nails hinges on having the right arsenal. Below is a checklist of must‑have items, followed by a quick price comparison table to help you budget.
- Base coat – protects natural nails and improves polish adhesion.
- Top coat – seals the gradient and adds shine.
- Two or more nail polishes (compatible finishes, e.g., matte with glossy).
- Sponges – natural sea sponges or synthetic makeup sponges work best.
- Fine‑tip brush or nail art brush – for detailing and smoothing edges.
- Cuticle oil – keeps nail beds healthy during the process.
- Quick‑dry spray or LED lamp (optional) – speeds up drying time.
| Brand | Shade | Finish | Approx Price (USD) |
|---|---|---|---|
| Essie | Sunset Rose | Glossy | 12 |
| Sally Hansen | Midnight Navy | Matte | 8 |
| Zoya | Golden Hour | Glitter | 15 |
| OPI | Peach Fuzz | Sheer | 13 |
Choose polishes that complement each other and match the intended gradient direction. A matte shade paired with a glossy one often yields the most striking contrast.
Step 3: Preparing Your Natural Nails for a Flawless Canvas

Even the most skilled artist can be undermined by poorly prepped nails. Follow these steps to create a smooth, even base:
- Remove any old polish with a non‑acetone remover.
- Shape the nails with a file, aiming for a consistent length and shape.
- Gently push back cuticles using a cuticle pusher; avoid cutting them.
- Buff the surface lightly to eliminate ridges.
- Apply a thin layer of base coat and let it dry completely (about 2‑3 minutes).
Proper preparation not only enhances the ombre effect but also prolongs the life of your manicure.
Step 4: Mastering the Sponge Technique for a Seamless Gradient

The sponge method is the most accessible way to achieve a professional‑grade ombre. Here’s a step‑by‑step breakdown:
4.1. Cutting and Preparing the Sponge
Trim the sponge into a shape that fits the nail width—usually a small rectangle about 1 cm tall. Dab the edges with a paper towel to remove excess moisture, which prevents polish from soaking into the sponge and creating blotches.
4.2. Loading the Sponge with Color
Apply a thin strip of the lighter shade on the left side of the sponge and a slightly darker shade on the right. Overlap the colors by about 1‑2 mm to ensure a smooth blend.
4.3. Pressing the Sponge onto the Nail
Place the sponge gently on the nail, starting at the cuticle and moving toward the tip in one swift motion. Apply light pressure; too much force can create streaks.
4.4. Repeating and Refining
Repeat the press‑and‑lift motion 3‑4 times, rotating the sponge slightly each time to deepen the gradient. Once the desired effect is achieved, let the polish set for 30‑60 seconds before moving on.
Tip: Work on one nail at a time to maintain consistency across all ten nails.
Step 5: Enhancing the Ombre with Details and Finishing Touches

After the gradient is set, you can add artistic details that elevate the look from simple to spectacular.
- Use a fine‑tip brush to draw a thin line of metallic polish along the tip for a “gradient accent.”
- Apply a dab of glitter polish to the base for a sunrise sparkle.
- Experiment with negative space by masking a portion of the nail before sponging.
Once satisfied, seal the design with a generous coat of top coat. This protects the gradient, adds shine, and prevents premature chipping.
Step 6: Troubleshooting Common Ombre Nail Issues
Even seasoned nail artists encounter hiccups. Below are frequent problems and how to fix them quickly.
- Banding or harsh lines: Lightly buff the surface and re‑sponge with a cleaner sponge.
- Uneven color intensity: Apply a thin layer of the lighter shade over the entire nail before sponging to create a uniform base.
- Polish bleeding through the sponge: Pat the sponge dry with a paper towel before each press; consider using a silicone sponge which absorbs less.
- Quick fading: Use a quick‑dry top coat formulated for high‑gloss finishes; avoid water exposure for the first hour.
Addressing these issues as they arise saves time and preserves the professional look of your ombre nails.
Step 7: Caring for Ombre Nails to Extend Their Lifespan
Maintaining an ombre manicure is easier than you think if you follow a simple care routine.
- Apply cuticle oil nightly to keep the nail bed moisturized.
- Avoid using your nails as tools; this reduces stress on the polish.
- Wear gloves when doing household chores, especially with detergents.
- Schedule a touch‑up every 2‑3 days by re‑applying a thin top coat.
With proper care, a well‑executed ombre can last up to two weeks without losing its gradient integrity.
Quick Ombre Nail Facts You Might Not Know
- The word “ombre” comes from the French “ombrer,” meaning “to shade.”
- Ombre nails were first popularized in high fashion runway shows in the early 2010s.
- Using a silicone sponge reduces pigment absorption by up to 30% compared with natural sea sponges.
- Matte‑to‑gloss transitions create the illusion of longer nails.
- Adding a clear glitter top coat can increase the durability of the manicure by roughly 15%.
Frequently Asked Questions
Can I create an ombre effect with only one nail polish?
Yes. By diluting a single polish with a clear base or top coat, you can achieve a subtle gradient from sheer to full opacity.
Do I need a UV lamp for ombre nails?
No. The sponge technique works with regular air‑dry polishes. A UV/LED lamp is only necessary if you use gel polishes.
How long does it take to do a full set of ombre nails?
For beginners, expect 45‑60 minutes. With practice, the process can be trimmed to 20‑30 minutes.
Is it safe to use household sponges for nail art?
Household sponges can contain dyes or chemicals that may affect polish color. Dedicated makeup or nail art sponges are recommended for consistent results.
Can I combine ombre with other nail art trends like marble or chrome?
Absolutely. Many artists layer a marble base and then apply an ombre top layer, or they add chrome foil over the gradient for extra dimension.
What is the best way to remove ombre nail polish without damaging my natural nails?
Soak a cotton pad in acetone, place it on the nail, and wrap with foil for 10‑12 minutes. Gently push off the softened polish with a wooden stick, then moisturize with cuticle oil.
Final Thoughts
Ombre nails are a versatile, eye‑catching trend that blends artistry with relatively simple technique. By selecting complementary shades, mastering the sponge method, and following the care tips outlined above, you can create salon‑quality gradients at home and keep them looking fresh for weeks.
Experiment with color combos, add personal touches like glitter or metallic accents, and most importantly, enjoy the creative process. Your next flawless ombre manicure is just a few steps away.

Hi, I’m Emily Carter, the mind and heart behind CaptionMood — a creative space designed to help you express your thoughts with the perfect words.
As a writer and digital content enthusiast, I’ve always believed that captions are more than just text; they’re emotions, stories, and reflections of who we are. With CaptionMood, my mission is to provide unique and engaging Mood Captions, Occasion Captions, and Social Media Captions that resonate with people from all walks of life.
Thank you for visiting and being part of this journey. Through CaptionMood, I hope to inspire, connect, and make every post more meaningful.