Whether you are a seasoned lash artist or just starting out, mastering the lash map is the cornerstone of creating flawless, customized extensions that keep clients coming back. A well‑crafted lash map not only streamlines your workflow but also ensures safety, comfort, and a look that truly enhances each individual’s natural beauty.
In this ultimate guide we will walk you through every stage from understanding the concept to after‑care—so you can design, apply, and maintain lash extensions with confidence and precision.
Understanding What a Lash Map Is and Why It Matters

Definition and Core Concept
A lash map is a visual blueprint that outlines where each individual lash extension will be placed on a client’s natural lashes. Think of it as a detailed diagram that assigns length, curl, thickness, and material to specific zones of the eye, ensuring a balanced, harmonious result. By mapping out the extensions before you pick up the tweezers, you minimize guesswork and reduce the risk of over‑loading delicate natural lashes.
Core Benefits for Artists and Clients
For artists, a lash map provides a repeatable process, cuts down on application time, and helps maintain consistency across appointments. For clients, it translates into a personalized look that complements their eye shape, lifestyle, and desired intensity, while also protecting the health of their natural lashes. In short, a solid map is the bridge between artistic vision and safe, lasting results.
Step 1 – Preparing Your Tools and Workspace

Essential Tools and Materials
- High‑quality tweezers (straight and curved)
- Adhesive with appropriate drying time
- Micropipettes for precise glue application
- Lash extensions of varying lengths, curls, and thicknesses
- Disposable eye pads and microbrushes
- Sanitizing solution and UV lamp (optional)
Hygiene Practices and Setup
Before any client arrives, sanitize all reusable tools with an approved disinfectant and let them air‑dry. Set up a clean, well‑lit workstation, preferably with a magnifying lamp to see fine details. Arrange your extensions in a logical order—by length, curl, or thickness—so you can locate the right piece quickly while you work.
Step 2 – Assessing Client Eye Shape and Desired Look

Eye Shape Analysis
Begin by observing the client’s natural lash line, eye size, and any asymmetries. Common eye shapes include almond, round, hooded, and down‑turned. Each shape benefits from a different mapping strategy. For example, almond eyes often look best with a balanced “flared” effect, while hooded eyes may require more volume at the outer corners to create lift.
Desired Style Consultation
Ask the client about their lifestyle, maintenance preferences, and the look they envision—whether it’s a natural “day‑time” enhancement, a dramatic “glam” effect, or something in between. Document the preferred length range (e.g., 8‑12 mm), curl type (e.g., J, B, C, D), and thickness (e.g., 0.10‑0.20 mm). This information guides the mapping decisions you’ll make later.
Step 3 – Designing the Lash Map Layout

Mapping Techniques and Zones
Divide the eye into three primary zones: inner, middle, and outer. Within each zone, decide on the density (how many extensions per natural lash) and the length gradient. A common approach is to use shorter extensions on the inner corner, medium lengths in the middle, and the longest lashes on the outer corner to create a natural “cat‑eye” lift.
Layering Strategies for Volume and Length
For classic (one‑to‑one) mapping, each natural lash receives a single extension. For volume mapping, you’ll attach 2‑6 ultra‑light extensions to each natural lash, forming a “fan”. Decide early which technique suits the client’s desired outcome. Sketch the map on a printable eye chart or use a digital lash mapping app to visualize the final look before you start.
Step 4 – Choosing the Right Lash Extensions for Each Zone

Length, Curl, and Thickness Selection
Match the extension specifications to the zones you defined. Below is a quick reference table that many artists keep handy when selecting lashes.
| Zone | Length (mm) | Curl | Thickness (mm) | Recommended Technique |
|---|---|---|---|---|
| Inner Corner | 8‑10 | J‑B | 0.10‑0.12 | Classic or Light Volume |
| Middle | 11‑13 | C‑D | 0.12‑0.15 | Classic / Medium Volume |
| Outer Corner | 14‑16 | D‑L | 0.15‑0.18 | Volume or Hybrid |
Material Considerations
Silk lashes offer a soft, natural sheen and are ideal for clients seeking a subtle look, while mink lashes provide a lightweight, fluffy texture suitable for dramatic volume. Synthetic lashes are the most durable and cost‑effective, perfect for high‑turnover salons. Always confirm the client’s allergy history before finalizing material choices.
Step 5 – Executing the Application with Precision
Isolation and Bonding Basics
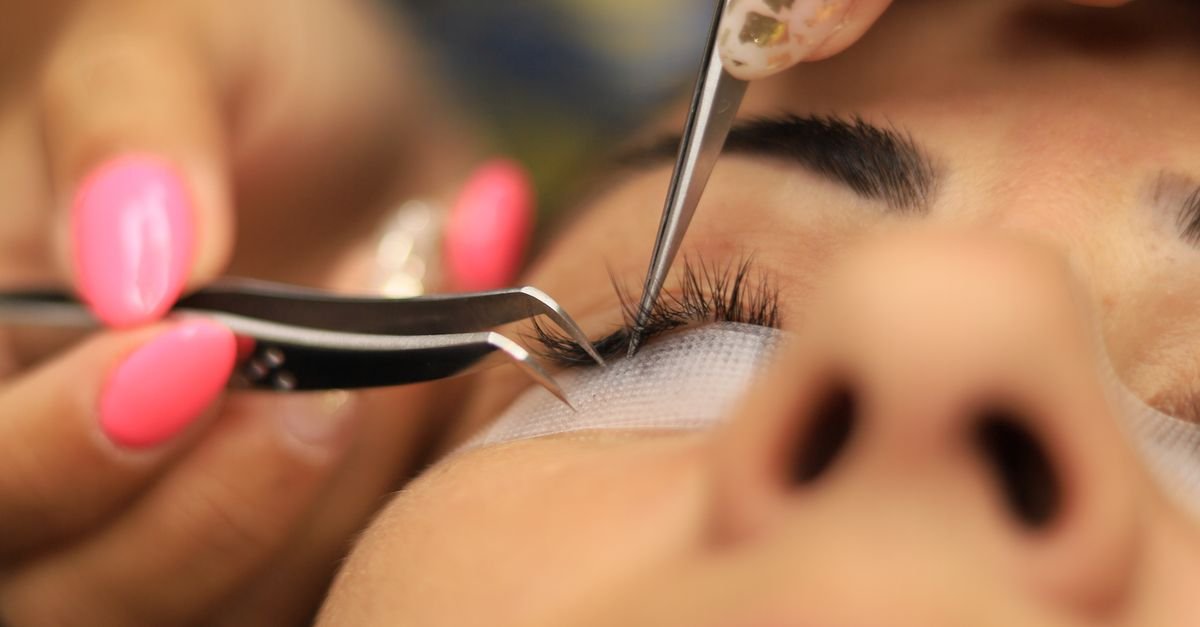
Isolation is the act of separating a single natural lash from its neighbors using tweezers. This step is non‑negotiable; improper isolation leads to clumping, premature fallout, and potential damage. Once isolated, dip the base of the extension into a small amount of adhesive—no more than a half‑second dip—to avoid excess glue that can cause irritation.
Placement Order and Technique
- Start with the outer corner, applying the longest extensions first to set the overall shape.
- Proceed to the middle zone, maintaining consistent spacing and angle.
- Finish with the inner corner, using the shortest extensions to ensure a smooth transition.
Maintain a 90‑degree angle between the extension and the natural lash for optimal hold. For volume fans, create the fan on a silicone mat, then pick it up with tweezers and place it onto the natural lash in a single motion.
Step 6 – Aftercare Guidance and Touch‑Up Planning
Immediate Post‑Application Care
Instruct the client to avoid water, steam, and heavy eye makeup for the first 24‑48 hours to allow the adhesive to fully cure. Recommend a gentle, oil‑free cleanser for daily cleaning and advise against rubbing the eyes.
Long‑Term Maintenance and Fill Schedule
Natural lashes shed at a rate of 1‑2 weeks, so a fill appointment every 2‑3 weeks keeps the look full and symmetrical. Encourage clients to book their next appointment before more than 30 % of the extensions have shed, which typically occurs around the three‑week mark. Offer a quick‑touch‑up service for occasional gaps without a full fill.
Quick Lash Map Facts You Might Not Know
- Mapping reduces application time by up to 30 % because you eliminate indecision while working.
- Using a fan‑based volume map can increase perceived lash density without adding extra weight.
- The average client’s natural lashes can safely support 2‑3 mm of extension length beyond the lash line.
- Silk lashes are actually a synthetic blend; true silk is rarely used in extensions due to durability concerns.
- Proper isolation can extend the lifespan of an extension set from 4 weeks to 6‑8 weeks.
Frequently Asked Questions
Can I use the same lash map for every client?
No. While the basic principles of zoning and length gradients remain consistent, each client’s eye shape, natural lash health, and desired style require a customized map.
How long does it take to create a detailed lash map?
For an experienced artist, sketching a thorough map takes about 5‑10 minutes. Beginners may need 10‑15 minutes until they become comfortable with zone division and length selection.
Is a lash map necessary for classic (one‑to‑one) extensions?
Yes. Even classic applications benefit from a map because it ensures balanced length distribution and prevents over‑loading any single natural lash.
What adhesive drying time is optimal for most maps?
Most professional adhesives reach full strength in 8‑12 seconds. Choose a formula that matches the client’s humidity level and skin type to avoid premature fallout.
Can I modify a lash map mid‑session?
Occasionally, you may discover an unexpected gap or an uneven natural lash line. Small adjustments are acceptable, but major changes should be discussed with the client before proceeding.
Final Thoughts
Mastering the lash map transforms a routine lash extension service into a precise, artful experience that delights clients and protects their natural lashes. By following the step‑by‑step process outlined above understanding the concept, preparing your tools, assessing eye shape, designing a tailored map, selecting the right extensions, applying with meticulous technique, and providing thorough aftercare you’ll build a reputation for consistency, safety, and stunning results.
Keep practicing, refine your maps with each client, and watch your artistry and business grow in tandem.

Hi, I’m Emily Carter, the mind and heart behind CaptionMood — a creative space designed to help you express your thoughts with the perfect words.
As a writer and digital content enthusiast, I’ve always believed that captions are more than just text; they’re emotions, stories, and reflections of who we are. With CaptionMood, my mission is to provide unique and engaging Mood Captions, Occasion Captions, and Social Media Captions that resonate with people from all walks of life.
Thank you for visiting and being part of this journey. Through CaptionMood, I hope to inspire, connect, and make every post more meaningful.